Have you ever faced the situation when Windows does not let you install third party or unofficial drivers? You have to disable driver signature verification in order to install those drivers.
Note: Please save all your work before continuing, steps involve Windows restarting.
For Windows 8, Windows 8.1:
- Point mouse to right-top corner and select “Settings“.
- Now on the bottom clink “Change PC settings“.
- Then select “Update and Recovery” and “Recovery“.
- After clicking “Restart now“, your computer will be restarted.
- On next screen select “Troubleshoot” option.
- Now click on “Advanced options“.
- After that choose “Startup Settings” and click “Restart“, your computer will be restarted again.
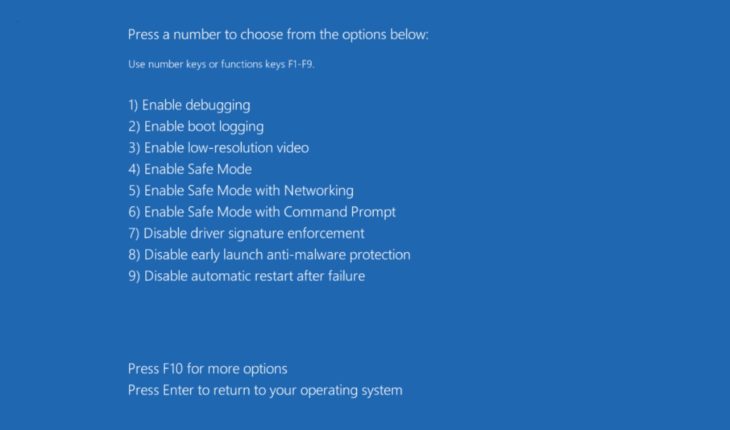
- Now we have specific options to boot with. Look for Disable driver signature verification option, it is 7. Now press “F7 ” or “7” on your keyboard when you see Startup setting screen.
- Now you can install your drivers.
For Windows 10:
- Press the “Windows + C” keys then click on “PC settings“.
- After that select “Update and Recovery” and click “Recovery” option.
- Click “Restart now” to restart your computer.
- After reboot select “Troubleshoot” option.
- Now click on “Advanced options“.
- Then choose “Startup Settings” and click “Restart” to restarted again.
- Now we have Startup setting screen. Disable driver signature verification option is 7. Press “F7 ” or “7” on your keyboard.
- Now you can install your drivers.
After next restart Windows driver signature verification will automatically turned on again.

SB Audigy Series Support Pack 6.1 Is good only for old version windows 10, newer version 1903 or 1909 are not working with this driver. Can you help?